

Debris spillage from a high-rise trash chute is not just an annoyance — it is a safety hazard, a liability, and a direct hit to your project timeline. When construction material escapes a chute mid-drop and rains down on a busy job site, the consequences range from damaged equipment and wasted labor to OSHA citations and genuine injury risk. The good news is that spillage is almost entirely preventable, and most of the fixes are straightforward once you understand why and where it happens.
This guide covers every practical angle: how to size and configure your chute system correctly, how to load debris safely, how to spot wear before it causes a problem, and how to stay compliant with safety standards that govern work at elevation. Whether you are managing a 10-story gut renovation or a 30-floor demolition, the fundamentals are the same.
Why High-Rise Debris Spillage Happens in the First Place
Understanding the root causes of spillage is the first step toward eliminating it. Most incidents trace back to one of four failure points: wrong chute sizing, poor attachment, overloading at the loading point, or worn chute sections that develop gaps over time.
The Physics of a Long Drop
Debris accelerates as it falls. A piece of drywall dropped into a 50-foot chute arrives at the bottom moving significantly faster than it entered. If any section joint is loose, misaligned, or undersized, that momentum presses outward and material escapes. High-rise applications amplify every small flaw in your system simply because gravity has more time to do its work.
Common Root Causes
- Undersized chute diameter — large, irregular chunks create jams that force material sideways and out of joints.
- Loose section connections — sections that are not fully seated allow gaps to open under load.
- Overloading the inlet — dumping too much material at once creates surge pressure that a chute cannot safely contain.
- Worn or punctured fabric — older chute sections that have not been inspected develop micro-tears that widen under repeated impact.
- Wind at elevation — high-rise sites experience significantly more wind than ground level; an unsecured chute can swing and pull joints apart.
- Improper discharge setup — if the bottom of the chute does not terminate directly into a dumpster or contained area, debris exits freely.
Choosing the Right Chute Length and Capacity for Your Drop Height
One of the most common mistakes on high-rise jobs is treating chute selection as an afterthought. The chute you choose must match the actual drop distance, the type of material going through it, and the daily volume of debris your crew generates.
Matching Chute Size to Your Project
U-Chute manufactures four standard sizes designed to cover the full range of construction and demolition applications. The debris chute systems for construction sites include the 10 ft lite-duty for smaller residential drops, the 10 ft heavy-duty for denser material on short runs, the 25 ft heavy-duty for mid-rise applications, and the 50 ft heavy-duty for full high-rise projects. These sizes can be stacked and combined to reach the exact drop height your building requires.
For a 20-story building with a floor-to-floor height of roughly 10 feet, you are looking at approximately 200 feet of drop. That means multiple 50 ft sections connected in sequence. Every additional section must be secured with equal care — a chain is only as strong as its weakest link, and a chute system is only as sealed as its loosest joint.
Heavy-Duty vs. Lite-Duty: When It Matters
The lite-duty 10 ft chute handles light, low-density debris — cardboard, lightweight packaging, soft insulation. For anything denser — concrete chunks, ceramic tile, roofing shingles, metal fasteners — you need heavy-duty construction. Using a lite-duty chute on dense demolition material is one of the fastest ways to cause a blowout mid-chute. On high-rise sites, always default to heavy-duty rated sections unless the material is definitively light.
Securing Chute Sections Properly: A Step-by-Step Approach
Loose sections are responsible for a disproportionate share of spillage incidents. The connection between every two chute sections is a potential failure point, and on a structure with significant wind exposure, those connections are under constant stress.
The Basic Connection Protocol
- Lay each section flat and inspect the connection hardware — hooks, straps, or rings — before assembly.
- Align sections so the upper section fits cleanly over the collar of the lower section, with no twisting.
- Engage all connection points fully. A section that is attached at two out of four points will rotate under load and open a gap.
- Once assembled, apply a light tensile tug to confirm each joint is seated. If a joint moves more than a half-inch, reseat it.
- After the first load passes through, re-inspect the top two and bottom two joints — initial loads can settle connections slightly.
Anchoring the Chute to the Building
The chute needs to be anchored to the building structure at regular intervals — generally every two floors or every 20 to 25 feet of vertical run. Anchor points prevent the chute from swinging in wind and reduce joint separation caused by lateral movement. Use scaffold ties, strapping, or dedicated anchor hardware appropriate for your building's exterior or interior shaft configuration. Never rely solely on the top attachment to keep a long chute in position.
Securing the Top Intake Opening
The intake opening at each floor where workers load debris is another critical control point. The chute mouth should be fitted with a collar or ring that seats firmly against the opening frame. If your intake point is a window or floor opening, the chute must be secured to that framing so it cannot be knocked loose when workers are actively loading material. A loose intake is a direct invitation for spillage right at the loading point.
Loading Practices That Prevent Spillage Before It Starts
Even a perfectly assembled and anchored chute system can experience spillage if the crew loading it does not follow safe loading practices. This is a training and supervision issue as much as an equipment issue.
Controlling Material Size Before It Enters the Chute
Large, irregular debris chunks are the primary cause of chute jams, and jams cause pressure that forces spillage at the nearest weak joint. Before anything goes into the chute, establish a maximum size rule for your specific chute diameter. As a general standard:
- Break up drywall into pieces no larger than 2 feet by 2 feet.
- Smash concrete rubble into chunks that fit freely into the chute opening without forcing.
- Keep long, rigid objects — conduit, lumber scraps, pipe — out of the chute entirely. These bridge across the interior and create instant jams.
- Remove nails and hardware from lumber before loading where possible, as they can puncture chute fabric on impact.
Controlling Load Volume and Pacing
Surge loading — dumping a large pile of material all at once — creates a pressure wave inside the chute that exceeds the system's handling capacity. Train your crew to feed material steadily rather than dumping wheelbarrow loads all at once. A controlled, paced loading rhythm keeps material moving smoothly without building up pressure at joints. This is especially important on longer chute runs where material has more distance to accelerate.
Avoiding Wet or Sticky Materials
Wet concrete, saturated insulation, and similar sticky materials cling to chute walls and accumulate buildup that eventually breaks loose in large chunks. These chunks hit lower sections with sudden, concentrated force. Whenever possible, allow wet debris to dry before it enters the chute, or dispose of it separately. If wet material must go through, follow immediately with a flush of lighter, drier material to prevent buildup.
Inspection and Maintenance: Stopping Wear Before It Becomes a Spillage Event
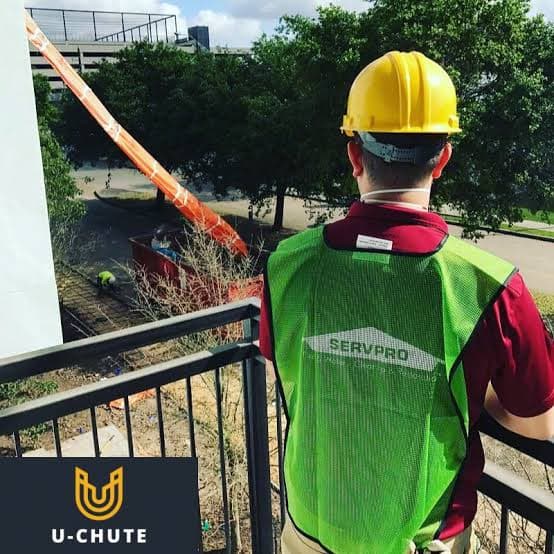
A reusable polymer-fabric chute system is built to last across multiple projects — but only if it is properly maintained. Inspecting your chute sections before, during, and after each project is non-negotiable on high-rise sites where a failure has serious consequences.
Pre-Project Inspection Checklist
- Unroll each section fully and hold it up to light to check for micro-tears, pinholes, or worn areas in the fabric.
- Inspect all connection hardware — hooks, rings, and straps — for deformation, rust, or cracking.
- Check seams along the full length of each section. Seam separation is a common failure point in older sections.
- Verify that the chute diameter is consistent along each section — a section that has been permanently deformed from a prior jam may have reduced diameter and cause a new jam.
- Set aside any section that fails inspection. Never deploy a questionable section on a high-rise run.
Mid-Project Inspection Protocol
On long projects, conduct a full visual inspection of the assembled chute system at least once a week. Walk the exterior of the building or use a scaffold to check each joint visually. Look for sections that have shifted out of alignment, anchor points that have loosened, and any fabric areas that show new abrasion from contact with the building's exterior surface. Catching a developing problem mid-project takes minutes; dealing with a spillage incident takes hours and often involves your safety officer, site management, and potentially city inspectors.
Post-Project Cleaning and Storage
After every project, clean each section before storage. Debris buildup on the interior hardens and creates abrasion points on the next use. Rinse sections, allow them to dry completely before rolling, and store them in a dry location out of direct UV exposure. Proper storage extends the usable life of each section and means you arrive at the next project with a reliable, inspected system rather than one that has degraded in a wet storage bay.
Wind Management on High-Rise Sites
Wind is a factor that ground-level debris management simply does not deal with at the same scale. At 20 or 30 stories, sustained wind speeds are meaningfully higher than at ground level, and gusts can be significantly stronger. An unsecured or under-anchored chute can swing, slam against the building exterior, and pull joints apart — or worse, swing outward and create a falling debris hazard for workers and the public below.
Minimum Anchoring Intervals in Wind-Exposed Conditions
In standard conditions, anchoring every 20 to 25 feet is adequate. On wind-exposed elevations — buildings above 15 stories in open areas, coastal sites, or sites without neighboring structures to provide wind shelter — tighten that interval to every 15 feet. If your site is in an area prone to afternoon gusts or seasonal high winds, consult your site safety plan and adjust anchoring accordingly. Erring on the side of more anchor points costs almost nothing; a wind-caused chute failure costs significantly more in cleanup, downtime, and potential injury claims.
When to Temporarily Suspend Chute Use
Have a clear wind speed threshold at which chute loading stops. Many experienced site supervisors use 25 to 30 miles per hour as the threshold for suspending chute operations in favor of other debris management methods. Post that threshold in your site safety documentation and ensure every crew member who loads the chute knows it. A chute swinging in high wind is not just a spillage risk — it is a struck-by hazard.
Discharge Zone Management: Controlling the Landing Point
Even a perfectly managed chute system can cause spillage if the discharge zone at the bottom is not set up correctly. The discharge end of the chute must direct material precisely into a contained area — typically a dumpster or a walled debris collection zone — with no gap between the chute exit and the container.
Aligning the Chute with Your Dumpster
Before the first load goes through, verify that the chute's discharge end is positioned directly over the center of the dumpster opening. A chute that discharges off-center will throw material over the side of the container under the momentum of a long drop. Use a plumb line from the intake point at the top of the chute run down to the discharge end to confirm alignment. Reposition the dumpster if necessary — the dumpster moves more easily than the chute.
Managing Dust and Fine Particle Spillage
Even when large debris is controlled, fine particles — drywall dust, concrete powder, wood dust — can escape at joints and at the discharge point. On high-rise sites, airborne particles at elevation can travel significant horizontal distances before landing. Minimize this by:
- Wetting dusty material lightly before loading where practical.
- Ensuring all section joints are fully sealed with no gaps.
- Using a covered or semi-enclosed discharge zone at the bottom where air displacement from falling material does not push dust outward.
- Following your site's dust management requirements under applicable environmental and safety regulations.
OSHA Compliance and Worker Safety at the Loading Point
Preventing debris spillage is not just a logistical concern — it is directly tied to OSHA's ergonomics and safe loading standards. Workers who are loading a chute at elevation are operating in a high-risk environment, and the setup of the loading point directly affects their safety.
Safe Loading Height and Positioning
Workers should never have to lift debris above shoulder height to load a chute. If your chute intake is positioned too high, workers compensate with awkward posture that increases both injury risk and the likelihood of material being dropped outside the chute opening. Adjust the chute intake collar height so the loading position is ergonomically safe — roughly waist to chest height for the worker performing the loading.
Keeping the Loading Area Clear
Maintain a clear, uncluttered zone around the chute intake at every floor where loading occurs. Workers carrying debris to the chute should have a straight, unobstructed path. Tripping hazards near an open chute intake are dangerous: a worker who trips while carrying heavy debris may lose control of the load and cause it to enter the chute in an uncontrolled way, or miss the opening entirely and drop material from elevation. See the frequently asked questions about U-Chute Trash Chute for guidance on loading zone setup.
Environmental Responsibility: Keeping Debris Contained and Sorted
Debris spillage is not just a safety problem — it is an environmental one. Construction and demolition waste is a major contributor to landfill volume, and material that spills from a chute is almost always lost to sorting and recycling. Keeping debris contained in the chute and directed precisely into the collection zone preserves the option to sort and divert recyclable materials.
According to EPA data on materials, waste, and recycling, construction and demolition debris represents a substantial portion of total solid waste generation in the United States. Reducing spillage keeps that material in the waste stream where it can be managed responsibly — and keeps your site cleaner and more compliant with local waste management requirements.
For a deeper look at the environmental case for proper debris management, see our post on construction debris chute environmental impact and carbon footprint.
Cost Impact of Spillage: Why Prevention Pays for Itself
It is worth putting hard numbers around what spillage actually costs, because the case for investing in proper chute selection, setup, and maintenance is financial as much as it is about safety.
Direct Costs of a Spillage Incident
- Labor for cleanup — material that spills from a high-rise chute may scatter over a wide area and require significant manual collection.
- Equipment damage — debris landing on equipment, vehicles, or neighboring property creates repair and replacement costs.
- Project delays — a serious spillage event stops work until the area is cleared and the system is inspected and repaired.
- OSHA fines — if a spillage event results in a worker injury or a reportable safety violation, fines can be substantial.
- Liability exposure — material that lands outside the site perimeter can result in property damage claims or personal injury litigation.
The Math on Chute Investment vs. Spillage Risk
A properly sized, heavy-duty chute system from U-Chute is a one-time purchase that can be reused across many projects. When you compare that cost against even a single serious spillage event — factoring in cleanup labor, potential fines, and project delay costs — the chute pays for itself quickly. See our detailed breakdown in the trash chute rental vs. purchase total cost of ownership analysis for the full cost comparison.
Selecting the Right U-Chute System for High-Rise Applications
U-Chute's reusable polymer-fabric chute systems are purpose-built for the demands of construction and demolition work. The 50 ft heavy-duty chute is the flagship product for high-rise applications — its heavy-duty fabric construction handles the impact forces of dense demolition material through long drops, and its section design allows for secure, consistent connections that hold under the conditions that cause spillage in inferior systems.
For jobs that span multiple floors with different debris types at different levels, mixing section sizes gives you flexibility. A 25 ft heavy-duty section at the top of a run where workers are loading from a specific floor, combined with 50 ft heavy-duty sections extending to ground level, is a common and effective configuration. You can review all sizing options and order directly through the U-Chute services page.
Every U-Chute ships free anywhere in the United States, so your delivered cost is your purchase price — no freight surprises when you are putting together a project budget. And because these are reusable systems, you are not factoring in single-use disposal costs after each job. For smaller residential jobs that might precede or follow a high-rise project, the residential demolition trash chute sizing guide covers lighter-duty applications.
Site-Specific Considerations: Regulations and Permitting
High-rise construction sites in many jurisdictions require permits or compliance documentation for debris chute installation. This is particularly true in dense urban areas where falling debris poses risk to the public and neighboring properties. Before you assemble your chute system on a high-rise project, confirm what your local jurisdiction requires.
For Texas-based contractors, the complete guide to trash chute regulations and permits in Texas covers state and local requirements in detail. If you are working in other states, check with your local building department — requirements vary significantly by city and county. Having your permitting in order before a spillage incident is very different from trying to get compliant after one.
For small and mid-size contractors managing costs across multiple projects, the cost estimate and buying guide for small construction projects provides practical budgeting guidance that applies whether you are doing one high-rise job a year or running multiple sites simultaneously. And if you operate in specific markets, check out our location-specific resources — from reusable trash chutes in Boulder, Colorado to reusable trash chutes in Asheville, NC — for area-specific guidance.
For additional guidance on safe material handling in construction environments, the EPA's recycling and materials management resources provide useful background on responsible debris handling that complements good site safety practice. Small business owners managing these projects can also find operational guidance through the SBA's business management resources.
Frequently Asked Questions
How often should I inspect my trash chute sections during a high-rise project?
Conduct a full visual inspection before the first load, again after the first full day of use, and then at minimum once per week for the duration of the project. Pay particular attention to joints, seams, and any area where the chute contacts the building's exterior surface. On projects lasting more than a month or involving dense, heavy material, increase inspections to twice per week. Catching a developing problem early eliminates the risk of a mid-project failure that stops work and creates cleanup costs.
What is the maximum material size I should put through a high-rise chute?
As a general rule, no piece of debris should exceed roughly one-third of the chute's interior diameter in any single dimension. For a standard construction chute, that means breaking large drywall sheets, concrete chunks, and bulky debris into manageable pieces before loading. Long, rigid objects like pipe, conduit, and full-length lumber should never enter the chute — they bridge across the interior and create jams that cause pressure-driven spillage at the nearest joint below the blockage.
How do I prevent chute joints from separating in high winds?
Increase your anchoring frequency on wind-exposed sites. In standard conditions, anchor every 20 to 25 feet of vertical run. On buildings above 15 stories or in areas with significant wind exposure, anchor every 15 feet. Additionally, establish a wind speed threshold — typically 25 to 30 miles per hour — above which chute loading is suspended. Ensure all connection hardware at each joint is fully engaged, not partially seated, before any material is loaded through the system.
Can I use a lite-duty chute on a high-rise demolition project to save money?
No. Lite-duty chutes are designed for low-density, light materials like cardboard, soft insulation, and packaging. High-rise demolition generates dense material — concrete rubble, ceramic tile, metal components — that impacts chute walls with significant force over a long drop. Using a lite-duty chute for this application will result in premature fabric failure, seam separation, and very likely a mid-project spillage event that costs far more than the savings on the chute itself. Always use heavy-duty rated sections for demolition and dense-material applications.
What should the discharge zone look like at the base of a high-rise chute?
The discharge end of the chute should terminate directly over the center of a dumpster or a walled debris collection area, with minimal gap between the chute exit and the container edge. Use a plumb line to verify alignment before loading. The collection container should be large enough to handle the material volume your crew generates without requiring frequent swaps that leave the discharge area uncovered. If dust is a concern, consider a semi-enclosed collection area to contain airborne particles generated by material impact at the bottom of the drop.
How do I handle wet or slurry debris in a high-rise chute without causing spillage?
Wet and slurry debris should be avoided in a trash chute whenever possible. Wet material clings to chute walls, builds up, and then releases in large, fast-moving chunks that stress joints. When wet debris must be managed through a chute, allow it to dry as much as possible beforehand, load it in small quantities, and follow each wet load with a quantity of dry, light material to clear the chute walls. Inspect the entire chute run more frequently when wet materials are being processed.
Are reusable chutes cost-effective for a single high-rise project versus renting a chute system?
For most contractors doing even one significant high-rise project per year, purchasing a reusable chute system is the better financial decision. Rental costs accumulate daily and do not build equity — at the end of a long project, you have paid rental fees with nothing to show for it. A purchased chute system from U-Chute ships free and can be reused across many projects, dramatically lowering the per-project cost over time. The full analysis is available in our trash chute rental vs. purchase total cost of ownership breakdown.
Ready to Eliminate Debris Spillage on Your Next High-Rise Project?
Preventing construction debris spillage from high-rise trash chutes comes down to three things: choosing the right chute system for your drop height and material type, setting it up correctly with proper anchoring and secure joints, and maintaining it with regular inspections and safe loading practices. None of it is complicated — but all of it requires attention and the right equipment.
U-Chute manufactures reusable polymer-fabric chutes built specifically for the demands that high-rise construction and demolition place on debris management systems. The 50 ft heavy-duty system, and all other sizes, ship free anywhere in the United States. Order directly online and have the right system on your site before your next project breaks ground.
Browse U-Chute debris chute systems and select the size that matches your project — or contact U-Chute if you have questions about which configuration is right for your specific application.