
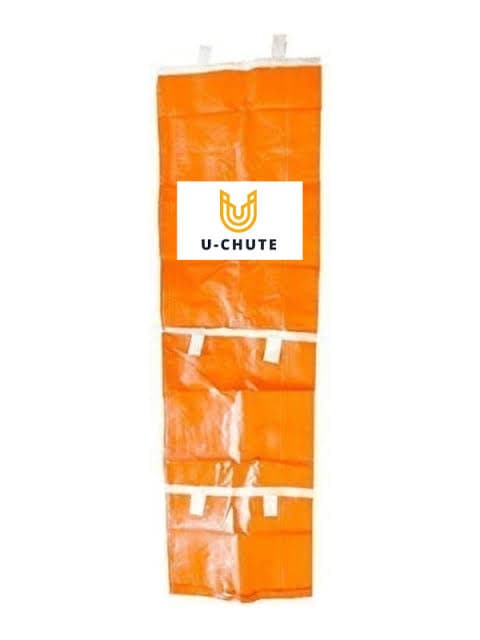
A roofing demolition debris chute setup can be the difference between a clean, efficient tear-off and a chaotic, liability-riddled mess on the ground. Whether you are stripping shingles off a two-story residential house or tearing down a low-slope commercial roof, getting the chute installed correctly before the first bundle hits the ground is what separates seasoned crews from rookies who waste half a day cleaning up a scattered debris field.
This guide covers everything: sizing, anchoring, positioning, safety compliance, crew workflow, and the common mistakes that cost roofers time and money. By the end, you will have a clear, step-by-step playbook you can hand to your foreman and use on the next job — today.
Why Roofing Demolition Specifically Demands a Debris Chute
Roofing tear-offs generate an enormous volume of debris in a very short window. A single square of three-tab shingles weighs roughly 250 pounds. On an average 2,000-square-foot roof, that adds up quickly — and crews are moving fast to beat weather windows and labor budgets.
Without a chute, that debris goes over the edge in uncontrolled ways: thrown by hand, slid down tarps, or dropped directly. Each method creates hazards — scattered nails on the ground, falling shingle bundles that can strike workers or bystanders, and a landing zone that is never clean enough to be truly safe. A properly installed roofing demolition debris chute setup eliminates all of that by giving debris one controlled path from roof to dumpster or pile.
The Nail and Shingle Scatter Problem
Old roofing nails embedded in shingles are one of the most stubborn cleanup challenges in residential construction. When shingles are thrown or slid off a roof without containment, nails scatter across driveways, lawns, and neighboring properties — damaging tires, injuring workers, and opening contractors up to significant liability. A debris chute keeps the drop contained and directs everything into a single collection zone where a magnet roller or nail sweep does the job in minutes.
Speed and Labor Efficiency
Crews working with a properly positioned chute consistently out-pace crews without one. Rather than carrying torn-off shingles to the edge and pitching them, workers feed the chute mouth and keep moving. One crew member can often manage the chute intake while others focus on tearing — a division of labor that cuts total roof-off time significantly on any job over one square.
Choosing the Right Chute Size for Your Roofing Job
Sizing is the single most important pre-setup decision you will make. Undersized chutes jam, overflow, or create back-pressure that slows workers at the top. Oversized setups are not a safety hazard, but they cost more than necessary for smaller drops.
U-Chute manufactures four sizes of reusable polymer-fabric chutes to match the full range of roofing applications: a 10 ft lite-duty, a 10 ft heavy-duty, a 25 ft heavy-duty, and a 50 ft heavy-duty. Here is how to match the size to your job:
- 10 ft lite-duty: Best for single-story residential applications — a ranch home, a detached garage, or a low-slope addition where the drop height is under 12 feet. Shingle debris, light membrane scraps, and insulation batts move through cleanly.
- 10 ft heavy-duty: Ideal when you need a single short run but the debris is heavier — thick architectural shingles, cedar shakes, or tile pieces that would stress a lite-duty section.
- 25 ft heavy-duty: The go-to choice for standard two-story residential roofs and one-story commercial structures where the drop lands on a first-floor loading zone. Covers most suburban re-roofing jobs without needing an extension.
- 50 ft heavy-duty: Designed for multi-story commercial, three-story residential, or any project where eave height exceeds 20 feet. Sections stack to match whatever drop height the job demands. For a detailed breakdown of this model, see our 50ft Heavy Duty Construction Chute Specifications guide.
Measuring Drop Height Accurately
Measure from the point where the chute mouth will sit at the roof edge to the ground level at the dumpster or pile. Do not measure from the peak — measure from the eave or parapet where the chute will actually be anchored. Add two feet of buffer to ensure the bottom section hangs clear of the dumpster rim without dragging. If your measurement puts you between sizes, always go longer. You can always fold and tie off a short excess at the bottom; you cannot extend a chute that is too short.
Site Preparation Before You Install the Chute
A fast, safe roofing demolition debris chute setup begins on the ground, not on the roof. Rushing the prep phase is the number-one reason setups fail or need to be redone mid-job.
Ground Zone Setup
- Position the dumpster or debris pile directly below the planned chute exit point before anyone goes on the roof. Once the chute is installed, moving the dumpster is a two-person job at minimum.
- Mark a hard exclusion zone of at least six feet around the chute exit. Use cones, caution tape, or barrier fencing — whatever is appropriate for the site. No workers, bystanders, or pets enter this zone while debris is moving.
- If work is happening near a sidewalk, driveway, or public right-of-way, consult local permit requirements. Many municipalities require physical barricades and signage for any overhead work above a pedestrian area.
- Lay a tarp or plywood sheet on the ground under the exit to catch any debris that misses the dumpster and to protect driveways from nail punctures.
Roof Edge Inspection
Before anchoring the chute, walk the roof edge where the setup will live. Check for:
- Rotten or delaminated decking at the eave that might not support the attachment point
- Gutters or drip edge that will need to be temporarily removed or protected
- Obstructions below — air conditioner units, electrical meter boxes, or landscaping features that affect dumpster placement
- The angle of the roof pitch: very steep pitches can cause debris to hit the chute mouth at higher velocity, which matters for attachment security
Step-by-Step Roofing Demolition Debris Chute Setup
Once your ground zone is prepped and the right chute size is selected, follow this sequence every time. Consistency in installation prevents the mid-job failures that cost crews hours.
- Lay the chute sections out flat on the roof or ground and inspect each section for tears, worn grommets, or damaged attachment points before you commit to the installation position. Catching a damaged section before rigging saves a dangerous re-rigging job later.
- Start from the top section. The uppermost section — the one that will sit at the roof edge and receive debris from the crew — has the attachment grommets or loops that anchor to the structure. Secure this section first using rope, ratchet straps, or hook hardware rated for the expected debris load. Never rely on body weight or a single point of contact.
- Lower successive sections over the edge, connecting them to the section above as you go. Work from the roof, not from a ladder positioned at the side of the chute — a side-hung ladder can be struck by the chute if it swings during loading.
- Verify that each section connection is fully seated and the overlap is consistent all the way down. A partially connected section will separate under load — exactly when debris velocity is highest.
- Position the chute mouth so it overhangs the roof edge by six to twelve inches. This prevents debris from catching the fascia or gutter during the drop. For gutters that cannot be removed, position the mouth outside the gutter line entirely.
- Do a dry run before loading. Have one crew member toss a single small piece of scrap down the chute while another watches from ground level. Confirm the debris exits cleanly into the target zone, the attachment points hold without movement, and no sections are crimping or bottlenecking.
- Establish a loading protocol for the crew. One person feeds the chute at a time. No dumping large loads simultaneously. Staggered feeding keeps debris moving without creating jams or pressure buildup at connection points.
Anchoring Methods for Common Roof Types
Different roof assemblies call for different anchoring approaches:
- Asphalt shingle roofs: Anchor to the ridge beam or a roof jack positioned two to three feet back from the eave. A standard roof anchor plate with a rated rope through the chute's top grommet works well on most pitches.
- Flat or low-slope commercial roofs: Use deadweight ballast bags on a parapet-mounted anchor bar, or hook into existing roof access equipment anchor points if rated for the load. Never penetrate new membrane to set an anchor.
- Steep-pitch roofs (8:12 and above): Consider a secondary mid-point anchor to prevent the chute from swinging laterally under debris load. A guide rope tied off at an attic vent or soffit anchor keeps the chute tracking straight.

OSHA Compliance and Safety Considerations for Roofing Debris Chutes
Roofing is consistently one of the highest-risk trades for worker injuries. Falling debris — not just falling workers — is a major contributor to struck-by incidents on residential and commercial job sites. A correct roofing demolition debris chute setup directly addresses this risk category.
According to OSHA ergonomics and materials handling guidance, proper load management and controlled debris movement reduce both musculoskeletal injury risk and struck-by hazard exposure. Debris chutes are a front-line control for both.
Key Safety Rules to Post at Every Chute-Equipped Job Site
- Exclusion zone must be maintained at all times when the chute is in use. No exceptions for any reason.
- All workers below the chute exit point must wear hard hats rated to ANSI Z89.1 standards.
- Do not use the chute during high winds. A chute loaded with debris acts as a sail at the point of least anchoring, amplifying load on the attachment hardware. Establish a wind threshold (typically 25 mph sustained) and cease operations above it.
- Do not allow workers to reach into a loaded, in-use chute to clear a jam. Stop loading from the top, wait for debris to settle, then clear from the bottom if possible, or from the top with a long-handled tool.
- Inspect all attachment points at every break — mid-morning, lunch, and mid-afternoon at minimum. Heat cycling, vibration from loading, and cumulative stress can loosen hardware that was tight at setup.
Protecting the Public on Urban and Suburban Sites
On jobs in populated neighborhoods, debris containment is not just a safety issue — it is a liability and reputation issue. Shingles that land outside the target zone, nails that scatter across a neighbor's driveway, or dust that coats parked vehicles create real costs beyond cleanup. A properly positioned chute with a sealed dumpster or a tarped pile mitigates all of these. Many roofing contractors note that client referrals increase measurably when neighbors can see that the crew runs a clean, contained operation.
Roofing Debris Chute vs. Tarps and Manual Carrying: An Honest Comparison
Some roofing contractors — especially smaller owner-operated crews — still rely on tarps or manual carrying to manage tear-off debris. Here is an honest comparison of each approach for residential roofing demolition:
- Tarp method: A tarp is staked at the base of the wall and shingles are slid or thrown onto it. Fast to set up, low cost — but highly uncontrolled. Nails and debris scatter beyond the tarp regularly, the tarp must be repositioned as work moves around the roof, and ground crew must rake and collect constantly. No good for multi-story applications.
- Manual carrying: Crew carries debris to the roof edge and places it carefully. Nearly zero scatter risk, but extremely slow and physically demanding. OSHA ergonomics research consistently links repeated load-carrying on inclined surfaces to cumulative musculoskeletal injury. This method kills productivity on anything larger than a small shed roof.
- Debris chute: Higher upfront investment than a tarp, but the chute pays for itself in labor savings on a single mid-sized job. Debris goes straight to the dumpster, the ground zone stays clean, and crew fatigue is dramatically lower because workers are not hauling weight to the edge. A reusable chute like U-Chute's polymer-fabric system is a one-time purchase that works across dozens or hundreds of jobs.
For a deeper look at the economics of owning versus renting debris management equipment, see our post on trash chute rental vs. purchase total cost of ownership.
Common Roofing Demolition Debris Chute Setup Mistakes (and How to Avoid Them)
Even experienced crews make setup errors that compromise safety and efficiency. Here are the most common ones and the fix for each:
Mistake 1: Anchoring Only at the Top
Single-point top anchoring works on short chutes in calm conditions. On longer runs or steep-pitch roofs, the chute body swings and oscillates under debris load, putting repetitive stress on that single anchor. Fix: add a secondary anchor at mid-point, using a rope loop off a roof anchor or a standoff bracket that holds the chute body against the building without crimping it.
Mistake 2: Misaligning the Dumpster After Setup
Ground crew moves the dumpster after the chute is installed — usually to make room for vehicles or equipment — without adjusting the chute exit. Debris now partially misses the dumpster, scattering nails and material around the container. Fix: mark the dumpster position with spray paint or chalk on the driveway before installation and enforce a no-move policy for the duration of the job.
Mistake 3: Overloading the Chute at Once
Workers dump large piles in rapid succession, creating a debris slug that jams at the first connection point between sections. The pressure buildup strains the connections and can pop sections apart. Fix: establish a one-bundle-at-a-time feeding rule and enforce it at the start of every shift. It feels slower but is actually faster because it eliminates the time lost to clearing jams.
Mistake 4: Skipping the Pre-Use Inspection
A chute section with a worn grommet or a hairline fabric tear looks fine during a quick visual check. Under load, it fails. Fix: lay every section out flat before setup and physically feel every grommet and inspect every seam at close range. A failed section mid-job costs far more in time, safety risk, and potential injury than a two-minute inspection.
Mistake 5: Using a Lite-Duty Chute for Heavy Tile or Slate
Clay tile, concrete tile, and slate roofing are dramatically heavier per piece than asphalt shingles. A lite-duty chute is not rated for these materials. Fix: match the chute type to the debris type. For tile or slate demolition, use heavy-duty sections rated for the impact and abrasion loads these materials generate.
Workflow Integration: How to Run a Roofing Demolition Crew with a Chute
The best chute setup fails if the crew workflow does not integrate it properly. Here is a proven role-assignment model for a four-person residential tear-off crew using a debris chute:
- Tear-off team (2 workers): Strip shingles using pry bars and roofing shovels, working from the ridge toward the eave. Their output goes directly toward the chute mouth.
- Chute feeder (1 worker): Positioned at the chute mouth near the eave, this person receives debris from the tear-off team, breaks up large piles into chute-appropriate loads, and feeds steadily without overloading. This worker also watches the chute body for signs of jam or swing.
- Ground crew (1 worker): Manages the dumpster or pile zone, maintains the exclusion perimeter, sweeps the collection area periodically, and runs a magnetic nail sweeper after each full dumpster load to clear any scatter before it migrates beyond the work zone.
On larger commercial projects with bigger crews, scale this model proportionally — add tear-off workers before adding chute feeders. One feeder can handle the output of three to four experienced tear-off workers on most standard pitches.
Environmental and Waste Compliance for Roofing Debris
Roofing demolition waste is a significant contributor to construction and demolition (C&D) debris streams. According to EPA materials waste and recycling data, C&D debris constitutes a substantial portion of total solid waste generated nationally — and roofing materials are a major component.
Using a debris chute does not just protect workers; it enables better waste sorting. When debris is directed into a single, contained collection zone, separating recyclable materials — clean metal flashing, undamaged insulation boards, intact lumber from the decking — becomes practical. Random scatter across a yard or driveway makes sorting nearly impossible.
What Can Be Recycled from a Typical Roof Tear-Off
- Asphalt shingles: Many regions now have shingle recycling programs that process old shingles into road-paving aggregate. Check with your regional waste hauler before assuming shingles must go to landfill.
- Metal flashing and drip edge: Scrap metal recyclers accept most residential flashing with minimal prep. Keeping it separated at the chute exit makes this easy.
- Wood decking: Clean dimensional lumber can be diverted to wood recyclers or donated through deconstruction programs. Contaminated or nail-heavy material typically goes to landfill, but separation at the collection point gives you options.
- Insulation: Rigid foam board insulation from re-roofing projects can sometimes be reused or recycled depending on condition. A contained collection zone lets crews pull clean pieces before they get buried under shingle debris.
For a broader look at responsible debris handling in construction, the EPA recycling overview is a practical starting point for contractors developing a project-level waste diversion plan.
Reusable vs. Disposable Chutes: The Long-Term Value Case for Roofing Contractors
Many roofing contractors encounter disposable fabric chute options — typically cheap woven polypropylene tubes sold in single-use configurations. They are inexpensive upfront, which makes them tempting for crews doing occasional demolition. But the math changes quickly for any contractor doing more than a handful of tear-offs per year.
U-Chute's polymer-fabric chutes are built to be reused across many jobs. The material resists the abrasion and impact of roofing debris — rough shingle granules, embedded nails, and tile shards that destroy single-use chutes in one or two deployments. A reusable chute that survives 50 jobs costs far less per job than a disposable replacement purchased for each project.
Beyond cost, reusable chutes align with the waste reduction goals that more clients — particularly commercial property managers — are beginning to require of their contractors. A reusable system generates no chute waste, no packaging waste per deployment, and demonstrates an operational maturity that single-use equipment does not. This is increasingly relevant as sustainability expectations work their way into commercial roofing bid requirements.
Special Considerations for Different Roofing Demolition Applications
Residential Re-Roofing (Full Tear-Off)
This is the most common application. Debris volume is predictable, drop height is usually under 25 feet, and the work zone is typically a private driveway or yard. A 25 ft heavy-duty chute handles the majority of two-story residential work. Position the chute at the most accessible eave — usually the driveway side — to minimize haul distance for the dumpster truck. Crews doing high-volume residential work should consider owning multiple chute sets so back-to-back jobs can run without breaking down and redeploying the same equipment on the same day.
Commercial Flat Roof Demolition
Commercial tear-offs involve larger surface areas, heavier membrane systems (TPO, EPDM, modified bitumen), and often multi-story drops to loading dock level. The 50 ft heavy-duty system is the standard choice here. Loading dock placement of the dumpster often simplifies ground-zone management, and crews should coordinate with building management on exclusion zone signage for tenant or pedestrian safety below. See our guide on preventing debris spillage on multi-story buildings for additional tactics specific to taller structures.
Historic and Specialty Roofing
Slate, clay tile, and cedar shake tear-offs require extra care in chute selection and feeding pace. These materials are heavier per piece and often more jagged than asphalt products. Use heavy-duty sections, enforce a one-piece-at-a-time rule for large tile, and inspect the chute more frequently during the job. For historic restoration projects where original materials are being saved for reuse, a chute is typically not appropriate for the salvaged pieces — hand-carry those to a protected staging area separately and use the chute only for broken or non-salvageable debris.
Where U-Chute Ships and What to Expect When You Order
U-Chute ships all four chute sizes free anywhere in the United States. You choose the size your job demands, place the order online, and the chute ships directly to you — no freight negotiation, no distributor markup, no minimum order. Roofing contractors and demolition crews across the country use this model to keep equipment costs simple and predictable.
If you are managing jobs across multiple regions, our location pages give you a quick local reference for availability and delivery context. Contractors in markets like Boulder, Colorado, Asheville, NC, and Sarasota, Florida have the same access to U-Chute equipment as crews in major metro markets — same product, same free shipping.
For contractors newer to debris chute systems or evaluating options for the first time, the construction debris chute vs. dumpster comparison is a useful read before committing to a setup approach. And if your primary application is junk removal rather than roofing, the debris chute guide for junk removal companies covers the workflow differences in detail.
Questions about which size fits your specific project? The U-Chute FAQ page covers common sizing and usage questions, and the contact page connects you directly with the team.
Frequently Asked Questions
What size debris chute do I need for a standard two-story residential roof tear-off?
For most two-story residential roofs, a 25 ft heavy-duty chute is the right choice. Eave heights on two-story homes typically range from 18 to 22 feet, and the 25 ft chute provides the drop clearance you need with a comfortable buffer. If your home has a tall first story or a raised foundation, measure your actual eave-to-ground distance before ordering and add two feet to ensure the chute exit clears the dumpster rim without dragging. When in doubt, go with the longer chute — you can always manage a short excess at the bottom.
Can I use a debris chute on a steep-pitch roof?
Yes, but steep pitches require additional anchoring attention. On pitches of 8:12 and above, debris enters the chute at higher velocity and the chute body can swing laterally under load. Add a secondary mid-point anchor to stabilize the chute body against the building facade, and consider a guide rope at the eave level to keep the mouth correctly positioned. Use heavy-duty sections for steep-pitch applications — the higher debris velocity increases impact stress at section connections and at the chute body itself.
How do I prevent the chute from jamming during a roofing demolition?
Jams almost always result from overloading. Feeding too much debris at once creates a slug that stalls at section connection points where the interior diameter tightens slightly. The fix is a strict one-load-at-a-time feeding protocol enforced by whoever is working the chute mouth. Break up large piles before feeding. On warm days, asphalt shingles can become tacky and stick together, so smaller loads are even more important. If a jam does occur, stop feeding immediately from the top and wait for debris to settle before attempting to clear from the bottom or using a long-handled tool from the roof.
Do I need a permit to use a debris chute for roofing work?
Permit requirements vary by municipality and by the location of the work. On private property with the dumpster and chute entirely within the property line, most jurisdictions do not require a separate chute permit beyond the standard roofing permit for the tear-off work itself. However, if the chute or dumpster placement extends over a public sidewalk, alley, or right-of-way, many cities require a right-of-way use permit and physical barricading. Always check with your local building or public works department before setting up a chute in or near a public space.
How do I clean and store a reusable debris chute after a roofing job?
After use, shake out loose debris from each section starting from the top. A garden hose rinse removes asphalt dust and granule residue that, if left to dry, can stiffen the fabric and degrade it over time. Allow sections to dry fully before folding and storing — storing wet sections promotes mildew in the fabric weave. Inspect each section for tears, worn grommets, or damaged attachment hardware before storage so you know the condition going into the next job. Store sections flat or loosely coiled in a dry location away from direct UV exposure for long periods.
Is a debris chute appropriate for tile or slate roofing demolition?
Yes, with the right chute specification. Clay tile, concrete tile, and slate are significantly heavier and more abrasive than asphalt shingles, so always use heavy-duty chute sections for these applications — never lite-duty. Feed one tile at a time rather than in batches, and inspect the chute body more frequently during the job for signs of wear at impact zones. For historic restoration projects where original tiles are being salvaged, hand-carry the salvageable pieces to a protected staging area separately and use the chute only for broken or non-reusable material.
Can one person set up a roofing demolition debris chute alone?
For short chutes on low-slope or single-story applications, one experienced person can manage setup, though it is slower and carries more risk of dropping sections over the edge. For anything above a single story, two-person setup is strongly recommended: one person on the roof managing the top anchor and feeding sections over the edge, and a second person on a ladder or at ground level guiding sections into alignment and confirming that each connection is fully seated. The ground-level person also serves as a safety observer, ensuring no one enters the exclusion zone during setup.
Ready to Set Up Your Next Roofing Demolition Job the Right Way?
A proper roofing demolition debris chute setup is not complicated — but it does require the right equipment, the right size, and a consistent crew protocol. U-Chute manufactures polymer-fabric chutes in four sizes designed specifically for the demands roofing and demolition crews put on their equipment: heavy debris, repeated loading, and job after job of hard use.
All four sizes ship free anywhere in the United States. Browse the full lineup on the U-Chute debris chute systems page, read through the FAQ if you have sizing questions, and visit the About page to learn more about how U-Chute builds these systems. When you are ready, place your order online and get the chute your next job demands delivered directly to you — no delays, no guesswork.