
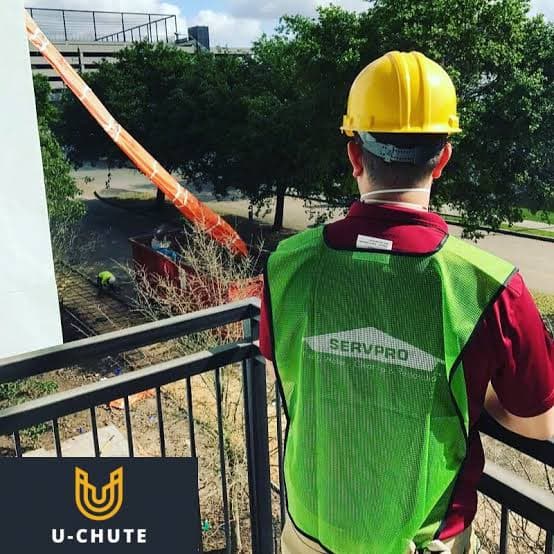
Every contractor who has ever sent a crew to the top floor of a demo job with no debris management plan knows exactly how that day ends — chaos at the bottom of the stairwell, debris piling in the wrong place, and someone's back paying the price. A well-executed trash chute installation checklist is the difference between a clean, efficient job site and a costly, injury-prone one.
This guide is built specifically for contractors, demolition crews, roofers, and junk removal companies who need a reliable, repeatable setup process for construction debris chutes. Whether you're hanging a chute on a two-story residential gut-out or running a full 50 ft system on a commercial demo, every step here applies. Use it as a planning document, a field reference, or a training tool for new crew members.
Let's get into it.
Why Contractors Need a Standardized Installation Checklist in 2026
Job site efficiency is under more scrutiny than ever. General contractors, project owners, and site safety officers are looking at every workflow for time savings and liability reduction. A trash chute system that goes up wrong — or gets improvised on the fly — creates real risk: falling debris, unstable anchor points, inefficient loading zones, and regulatory headaches.
Standardizing your installation process with a written checklist delivers three concrete benefits:
- Repeatability: New crew members can follow the same steps without senior supervision at every stage.
- Safety compliance: A documented pre-installation check aligns with OSHA expectations for fall protection and debris management on elevated work sites.
- Time savings: A crew that has run the same checklist ten times can hang a chute system in a fraction of the time compared to one improvising every install.
Reusable polymer-fabric chutes like those made by U-Chute Trash Chute are designed with field efficiency in mind — lightweight sections, modular stacking, and free US shipping so you're not waiting on logistics. But even the best equipment needs a disciplined installation process to perform at its best.
Pre-Installation Planning: The Work You Do Before You Arrive
The installation begins before your crew touches the first chute section. Skipping pre-site planning is one of the most common mistakes contractors make, and it causes the majority of day-of delays.
Measure the Drop Height Accurately
Your drop height determines how many chute sections you need. Measure from the highest debris loading point — typically the floor where the heaviest demo work is happening — down to the ground-level collection area. Add a small buffer (2 to 3 ft) to account for angle in the chute run.
- Use a laser measure or tape for accuracy — don't estimate from memory.
- Account for any intermediate floors you'll need to pass through or secure around.
- If the job spans multiple floors over time, plan for a modular chute that can be extended — the 25 ft and 50 ft heavy-duty U-Chute systems are designed for exactly this kind of scalable use.
Identify the Anchor Points and Building Attachment Locations
Before ordering or staging your equipment, walk the building and mark every point where the chute will be secured. Poor anchor selection is the leading cause of chute instability and is a serious safety risk when debris loads are at their heaviest.
- Prefer structural members — studs, beams, window frames with reinforced headers — over drywall or finish materials.
- Note any windows, doors, or access openings that will serve as loading points mid-chute.
- Confirm no utility lines run behind the planned attachment surfaces.
Confirm the Ground-Level Collection Zone
Where is debris going once it exits the chute? Define the collection zone before the first piece of debris goes in. An undefined collection area creates a hazard at the busiest point of operation.
- Mark a clear perimeter around the chute exit point — a minimum of 6 ft in all directions is a reasonable baseline.
- Confirm dumpster or debris container is positioned and accessible for direct loading.
- Establish who is responsible for monitoring the collection zone during active use.
Equipment Staging: Getting Your Gear to the Right Place
Once your measurements are confirmed and anchor points are identified, stage your equipment before the crew starts any demo work. Trying to install a chute mid-job — when debris is already piling up — puts everyone behind.
Inventory Your Chute Sections
Count every section before you start. Missing a single section mid-install on a multi-story job means someone makes a trip back to the truck or the staging area, burning time you don't have. Lay all sections out on the ground in order before any attachment work begins.
- Inspect each section for damage — tears, bent attachment hardware, or compromised connection points.
- Confirm all connection hardware (hooks, ropes, straps) is present and functional.
- For heavy-duty chutes on tall drops, verify that the heavier sections are staged at the bottom and the upper sections are accessible for top-to-bottom install.
Gather Your Tools and Fasteners
A proper installation requires more than just the chute sections themselves. Missing a drill or the right anchor hardware wastes time.
- Hammer drill or impact driver with appropriate bit for the anchor substrate
- Rope or ratchet straps for intermediate securing (building-specific)
- Safety rope or lanyard if crew is working at elevation during installation
- Marker or tape for flagging anchor and collection zone perimeters
- Gloves — polymer-fabric chutes are smooth, but debris-covered connection points can cause cuts
Safety Briefing: What the Crew Needs to Hear Before the First Section Goes Up
A checklist without a safety briefing is just a list. Before installation begins, the crew lead must run a quick verbal briefing. This doesn't need to be a 20-minute safety meeting — five minutes covers the critical points and satisfies the documentation expectation of most general contractors and site safety plans.
Debris Falling Hazard Zones
Everyone on site — not just the installation crew — needs to know where the chute is going in and what the exclusion zone looks like at ground level. Signage helps, but a verbal briefing ensures it lands. OSHA's ergonomics and safe-handling guidelines reinforce that proper debris management reduces musculoskeletal risk alongside fall hazards — the two most common injury vectors in demolition.
- Identify the exclusion zone dimensions and who enforces them.
- Clarify what materials are and are not acceptable for the chute (more on that below).
- Assign a dedicated spotter at the collection zone during peak loading hours.
Working-at-Height Requirements
If anyone on your crew is attaching sections or anchor hardware above 6 ft, fall protection requirements apply. Confirm harness availability, tie-off points, and ladder or scaffold positioning before a single crew member goes up.
Step-by-Step Installation Process
This is the core of the checklist — the sequence every crew should follow on every install. Print this section, laminate it, and keep it on the job trailer.
Step 1: Establish and Mark the Top Loading Point
Identify and clearly mark the highest loading opening. This is typically a window opening, a floor edge, or a designated cut-out. Confirm the opening is large enough for debris to pass without jamming the chute neck.
Step 2: Secure the Top Section First
Begin the install from the top down, not the bottom up. The top section carries the tension of every section below it, so it must be anchored to a structural point that can handle the cumulative weight of loaded debris in transit.
- Use two independent anchor points for the top section whenever possible.
- Test the anchor by applying manual downward pressure before loading any debris.
- Confirm the chute opening at the top is oriented correctly for your planned loading motion.
Step 3: Connect and Secure Each Subsequent Section
Work your way down, connecting each section and anchoring it to the building as you go. Intermediate anchoring prevents swing and keeps the chute running straight — a chute with no intermediate anchors will whip under load and can pull free of the top mount.
- Anchor at least every 8 to 10 ft on a standard drop.
- For drops exceeding 25 ft, increase intermediate anchoring frequency — every 6 to 8 ft is preferable.
- Confirm all connection points between sections are fully engaged before moving down.
Step 4: Position and Secure the Exit Chute
The bottom exit section should direct debris flow toward the center of your collection zone, not toward any workers, walls, or equipment. Angle the exit section to deposit debris cleanly into the dumpster or staging area.
- If the exit chute swings, stake or weight it to maintain direction.
- Confirm there is no debris already blocking the exit zone before the first load goes through.
Step 5: Run a Test Load Before Full Operation
Before the full demo crew starts loading, run a small test batch of debris through the chute. This confirms the flow, reveals any snag points or narrow spots, and lets you address issues before you have 40 bags of drywall backed up at the loading point.

What Materials Are Safe to Run Through a Construction Trash Chute
Not everything belongs in a debris chute, and loading the wrong materials is one of the fastest ways to damage your equipment and create a safety hazard at the exit point. Establishing clear material guidelines is a non-negotiable part of the contractor's checklist.
Acceptable Materials
- Drywall and plaster chunks (bagged or loose, within weight limits)
- Roofing shingles and underlayment
- Lumber scraps and framing debris (no protruding nails without protection)
- Insulation (bagged preferred)
- Light concrete rubble (small pieces only — for heavy-duty chutes)
- Plastic sheeting, packing materials, and general construction waste
Materials That Should Never Go Through the Chute
- Full sheets of glass or large mirror panels — the impact risk at the bottom is severe
- Hazardous materials including asbestos-containing materials (ACM), lead paint debris, or chemicals — these require separate handling under EPA recycling and waste management guidelines
- Long steel rebar or pipe sections that could jam or tear the chute
- Large, intact appliances or fixtures
- Wet concrete or mortar — it will coat and stiffen the chute interior
Understanding what goes in the chute also has a downstream impact on how debris is sorted and ultimately processed at the waste facility. Separating recyclables from general demo waste saves disposal costs on many job types.
Sizing the Right Chute for Your Project
Choosing the wrong chute size is a checklist failure before installation even starts. U-Chute's four-size lineup covers the full range of contractor applications — knowing which one fits your project saves time, protects equipment, and keeps the job moving.
- 10 ft lite-duty: Best for single-story residential work — roofing cleanup, small interior demo, window replacements. Lightweight and fast to deploy.
- 10 ft heavy-duty: Same drop height but built for heavier material flows — concrete rubble, tile, dense drywall loads on a one-story or low two-story application.
- 25 ft heavy-duty: The workhorse for two- to three-story commercial and residential demo. Sections stack to match your drop height precisely.
- 50 ft heavy-duty: Multi-story commercial demolition, high-rise window replacement, large-scale roofing on tall structures. The go-to for crews running sustained heavy debris volumes.
See the full breakdown of how project scope maps to chute selection in our Trash Chute Cost Estimator by Project Scope 2026, and dig into per-project cost math in the Construction Debris Chute Cost Per Project 2026 breakdown.
Application-Specific Installation Notes
The core checklist applies to every job, but specific applications carry their own nuances. Here are the most common contractor use cases and what to adjust.
Roofing Tear-Off Projects
Roofing is one of the highest-volume applications for construction trash chutes. Shingles are dense, heavy in aggregate, and pile up fast. Install the chute before tear-off begins — don't wait until the crew is already pitching material off the edge.
- Secure the top section to the eave or fascia with roofer-specific anchoring — avoid attachment points on the roofing material itself.
- Position the exit section to load directly into a shingle dumpster, not onto a tarp (tarps shift and create tripping hazards).
- Monitor the exit zone continuously — shingle loads come fast and heavy.
For more on roofing and residential applications, the residential kitchen remodel under $5000 trash chute guide covers how to keep debris costs lean on smaller jobs too.
Interior Commercial Demolition
Multi-story commercial demo jobs are where chute selection and anchor planning matter most. A poorly anchored chute on a 40 ft drop with heavy drywall and concrete loads is a liability event waiting to happen.
- Use a dedicated window or floor opening as the loading point — don't try to run the chute through a stairwell unless the stairwell is clear of crew traffic during operation.
- If loading points exist on multiple floors, plan for intermediate entry collars or secured loading openings at each active floor.
- Review the full approach in our construction debris chute for interior demolition in multi-story commercial buildings guide.
Junk Removal and Property Cleanouts
Junk removal companies often deploy trash chutes on upper-floor apartment cleanouts, estate cleanouts, and commercial property turnovers. The debris profile is more mixed than a pure demo job — furniture, bagged goods, and loose materials all go through the same chute.
- Use the lite-duty 10 ft chute for single-floor apartment work — it's lighter and faster to set up and break down for high-frequency jobs.
- Always bag loose small items before loading — unbagged small debris creates blockage risk and exit-zone scatter.
- Break down large furniture before loading — a sofa cushion can go through; the frame cannot.
During-Operation Monitoring Checklist
Installation is just the beginning. Once the chute is live and the crew is loading, someone needs to be actively monitoring the system. A chute left unmonitored on an active site will eventually have a problem that nobody catches until it becomes a bigger problem.
- Top loading point: Confirm loaders are not overloading individual drops — steady, controlled loads move faster and safer than rushed dumps.
- Intermediate anchors: Walk the chute run every 30 to 45 minutes during heavy operation. Check that anchor points have not shifted or loosened.
- Collection zone: Monitor debris accumulation at the exit. If the dumpster is approaching full, pause loading before debris backs up into the chute itself.
- Chute condition: Listen for changes in flow sound — a sudden muffled tone can indicate a partial blockage inside a section.
- Weather changes: Wind above 20 mph puts lateral pressure on the chute and its anchor points. Evaluate whether to pause operation and add anchoring in high-wind conditions.
Cleardown and Takedown Checklist
How you take down a chute is as important as how you put it up. A rushed takedown leads to damaged sections, lost hardware, and a crew that shows up to the next job missing components.
Clear the Chute Before Detachment
Never begin detaching sections until you have confirmed the chute is clear of debris from top to bottom. A section of chute with material still inside it is heavier than it looks and can swing hard when the anchor is released.
Work Bottom to Top on Takedown
Reverse the installation sequence. Start at the exit section and work upward. This prevents sections above from dropping when the connection below is released.
Inspect and Inventory on Takedown
Every section that comes off the building gets inspected before it goes in the bag or the truck. Damage caught at takedown gets repaired or flagged before the next job — not discovered when you're already on-site.
- Check for tears, punctures, or fraying at connection points.
- Confirm all hardware (hooks, ropes, clips) is present and stored with the section.
- Wipe down sections if they have debris coating on the exterior — clean equipment stores better and lasts longer.
How Reusable Chutes Change the Economics of Every Job
The conversation around reusable polymer-fabric chutes has shifted significantly in 2026. Disposal costs are up, labor costs are up, and contractors are looking harder at every line item. A reusable chute that lasts across dozens of jobs fundamentally changes the cost-per-project math compared to disposable or single-use alternatives.
U-Chute's lineup ships free across the United States — there's no freight surcharge to eat into your margin when you order. Once the chute is on your truck, it goes to every job that needs it. The full debris chute system overview lays out exactly what's included with each size.
For contractors working regionally, location-specific guides cover local permit norms, site conditions, and contractor considerations that vary by market. The Cedar Park, Texas contractor guide and the Port St. Lucie, Florida guide are good starting points if you're working in those markets. U-Chute also serves contractors across the country — from Boulder, Colorado to Asheville, North Carolina to Sarasota, Florida.
Common Installation Mistakes and How to Avoid Them
These are the mistakes that experienced crews still make — usually under time pressure. Knowing them means you can catch them before they happen.
- Skipping the test load: Running a test is the fastest way to find a snag point. Do it every time, even on repeat job sites.
- Insufficient intermediate anchoring: The chute will look fine until it doesn't. Anchor at the recommended intervals regardless of how stable it appears under light load.
- Undefined collection zone: If the zone isn't marked and enforced, someone will eventually be standing in it when debris comes out. Mark it before the first section goes up.
- Overloading with non-approved materials: One large, rigid piece that jams the chute mid-drop costs more time to clear than it would have to carry it down manually.
- Rushing the takedown: Damage that happens in the last 10 minutes of a job shows up as a problem on the next job. Slow down at takedown.
- Wrong size for the drop: Using a 10 ft chute with extension hacks on a 20 ft drop is a liability. Match the chute to the drop height with the right product from the start.
Frequently Asked Questions
How do I calculate how many chute sections I need for my job?
Measure the vertical drop from your highest loading point to the ground-level collection zone. Add 2 to 3 ft as a buffer for the angle in your run and any clearance needed at the exit. U-Chute sections are modular and designed to stack — choose the product size closest to your drop height, and the lightweight sections connect to match your specific measurement. The 25 ft and 50 ft heavy-duty systems are specifically designed for multi-section stacking on taller drops.
What is the safest way to anchor a trash chute to a building?
Always anchor to structural members — studs, beams, reinforced window headers, or framing — never to finish materials like drywall or trim. Use a minimum of two independent anchor points at the top section. Add intermediate anchors every 6 to 10 ft along the chute run depending on total drop height. Test each anchor point under manual load before putting any debris through the system. For high-wind conditions, add anchoring frequency and consider pausing operation during gusts above 20 mph.
Can I use a construction trash chute for roofing tear-off?
Yes — roofing is one of the most common and effective applications for construction trash chutes. Shingles, underlayment, and roofing debris flow well through polymer-fabric chutes. Anchor the top section to the eave or fascia structure, not the roofing material itself. Position the exit section to load directly into a dumpster, and keep a dedicated spotter at the collection zone throughout the operation. The 10 ft heavy-duty and 25 ft heavy-duty models are the most commonly used for residential and light commercial roofing jobs.
How often should I inspect the chute during active use?
Walk the full chute run — from top loading point to exit section — at least every 30 to 45 minutes during heavy operation. Check that all intermediate anchor points are secure, listen for changes in debris flow that might indicate a partial blockage, and monitor the collection zone to ensure the exit is not backing up. In high-wind conditions or when running unusually heavy material, increase your monitoring frequency.
What materials should never go into a construction trash chute?
Never load full glass sheets or large mirror panels, hazardous materials including asbestos-containing materials or lead paint debris, long steel rebar or rigid pipe sections, intact large appliances or fixtures, or wet concrete and mortar. Hazardous construction waste requires separate handling under EPA waste management guidelines regardless of what debris management system you are using. When in doubt, bag and carry hazardous or oversized materials manually to the designated waste container.
How do I take down a trash chute safely at the end of a job?
First, confirm the chute is completely clear of debris from top to bottom before detaching any section. Then work from the bottom up — release the exit section first and work toward the top. This prevents sections above from dropping unexpectedly when a lower connection is released. As each section comes off, inspect it for damage, confirm all hardware is present, and store it cleanly. Damage caught at takedown can be addressed before the next job rather than discovered on-site.
Are reusable polymer-fabric trash chutes worth the investment compared to single-use options?
For contractors running more than a handful of jobs per year, reusable chutes are almost always the better economic choice. A single reusable chute system from U-Chute can serve dozens of jobs over its lifespan, with free US shipping eliminating freight costs on your initial order. The per-job cost drops significantly after the first few uses compared to renting or purchasing single-use alternatives. For a full breakdown of the math, see the Construction Debris Chute Cost Per Project 2026 guide.
Ready to Build a Better Debris Management System?
A reliable trash chute installation checklist is the foundation of efficient, safe debris management on every job you run. The equipment matters — but the process is what makes the equipment work every time.
U-Chute manufactures reusable polymer-fabric construction trash chutes in four sizes built for exactly the applications covered in this guide: residential roofing, interior commercial demo, junk removal, and multi-story heavy-duty drops. Every order ships free across the United States. No freight surprises, no waiting — just equipment that works.
Browse the full lineup, pick the size that fits your next project, and get it ordered today. If you have questions about which chute is right for your specific application, the U-Chute FAQ page covers the most common contractor questions, or reach out directly and get a straight answer.