
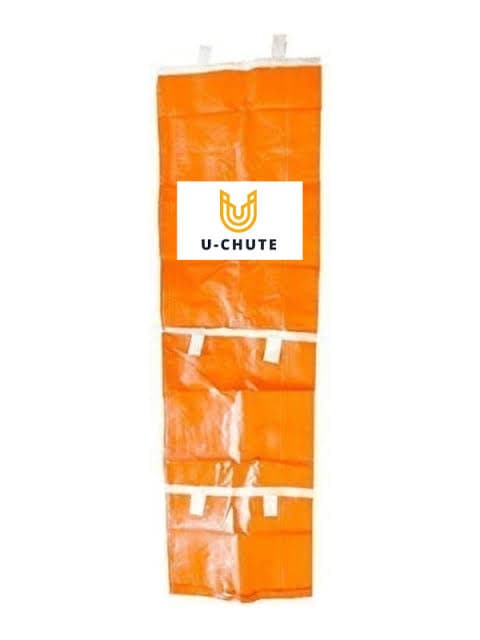
A 10ft construction trash chute is one of the most practical tools on a jobsite — light enough to move by yourself, short enough to deploy on residential roofs and single-story additions, and durable enough to handle shingles, drywall, broken concrete block, and general demolition debris. But like any piece of site equipment, it only keeps your crew safe when it is set up, used, and inspected correctly.
This checklist is built for contractors, roofers, junk removal crews, and demolition teams who want a repeatable, OSHA-aware process every single time they hang a 10ft chute. Work through it section by section before the first load drops, and you will eliminate the most common hazards that lead to spilled debris, equipment damage, and crew injuries.
Why a Formal Safety Checklist Matters for a 10ft Chute
Short chutes are sometimes treated as informal equipment — grab it, hang it, done. That mindset is where accidents start. Even a 10ft drop delivers real kinetic energy to whatever is at the bottom, and a poorly secured chute can swing, detach, or collapse under an uneven load. A written, repeatable checklist changes the culture on the job: safety becomes a procedure, not an afterthought.
OSHA's ergonomics guidance reinforces that safe material handling begins before the first item is lifted — not after someone gets hurt. Applying that principle to chute use means inspecting before deploying, not troubleshooting after a failure.
Who Should Run This Checklist
- Site supervisor or crew lead — responsible for the pre-deployment walkthrough
- The worker securing the chute at the top — responsible for the attachment inspection
- The ground worker managing the dumpster zone — responsible for the clearance and catch-area check
Each role owns a specific portion of the checklist. When everyone has a defined responsibility, nothing gets assumed and nothing gets skipped.
Pre-Delivery Equipment Inspection
Before the chute leaves your truck or storage area, run a fast but thorough visual inspection. Do not assume that equipment stored correctly since the last job is in perfect condition — UV exposure, stacking pressure, and transport vibration all cause wear over time.
Fabric and Seam Check
- Unroll the chute completely and lay it flat or hang it against a wall
- Look for tears, punctures, or fraying along every seam line
- Run your fingers along the stitching — any loose thread or separated panel is a disqualifier until repaired
- Check the interior surface for abrasion thinning; areas that have taken repeated impacts from brick or concrete debris are highest risk
Hardware and Attachment Point Check
- Inspect all hooks, rings, carabiner clips, or grommets for deformation, cracking, or rust
- Confirm that attachment points are still anchored to the body of the chute — a grommet that has pulled partway through the fabric is a failure point under load
- Verify that any secondary securing straps or tie-off loops are present and intact
If the chute fails the pre-delivery inspection, tag it out of service immediately. Running a damaged chute is not a cost-saving measure — it is a liability. U-Chute's polymer-fabric construction is engineered for genuine reuse, so a chute that passes inspection should serve you across dozens of jobs. Learn more about our full line of debris chute systems for construction sites.
Site Assessment Before Setup
The chute itself may be in perfect condition, but the site it is being installed on introduces its own variables. A site assessment takes five minutes and prevents the majority of real-world incidents.
Drop Zone Clearance
- Measure and mark a clearance zone at least 6 feet wider than the chute's exit diameter on all sides
- Confirm that no workers will pass through the clearance zone during active debris loading
- Check for underground utilities, buried irrigation lines, or fragile hardscape directly under the dumpster position
- If the chute exit will be directed into a roll-off dumpster, position the container so the chute's natural trajectory lands debris in the center — not the edge — of the container
Overhead Hazard Survey
- Identify any overhead power lines, telephone cables, or guy wires within the swing radius of the chute
- Check for overhanging branches, gutters, or roof extensions that could deflect the chute during loading
- Note any windows or exterior lights that could be struck by errant debris if the chute is not properly directed
Ground Surface Stability
- Confirm the dumpster or collection container is on a level, solid surface — soft soil under heavy containers shifts over time and can redirect the chute exit
- Check for slopes greater than five degrees; a container that rolls even slightly can pull a secured chute sideways
Attachment and Anchoring Procedure
Attachment is the single most consequential step in the checklist. A chute that detaches mid-job does not just spill debris — it becomes an uncontrolled projectile. Follow this sequence without shortcuts.
Top Attachment Steps
- Identify a solid structural anchor point at the top of the drop: a roof decking cleat, a window frame anchor, a scaffold pipe, or a purpose-built chute hook bracket
- Never anchor to gutters, downspouts, satellite dish mounts, or any decorative element — these are not rated for dynamic load
- Thread the primary hook or clip through the chute's top attachment loop and close any locking gate completely
- Add a secondary tie-off using a length of ratchet strap or heavy rope to a separate anchor point at least 18 inches from the primary
- Pull the chute taut vertically and confirm it does not rotate or swing laterally under hand pressure before loading anything
Mid-Span Stabilization for Full 10ft Extension
A 10ft chute is short enough that mid-span guys are optional in still conditions, but any wind above 15 mph creates enough lateral load to swing the chute away from its intended exit point. If the site is exposed to wind:
- Run a single guide rope from approximately the midpoint of the chute to a fixed point on the structure — enough tension to limit lateral swing without pulling the chute out of vertical alignment
- Tie the guide rope to the exterior structure, not to a worker or a freestanding ladder
Our complete field guide for roofing demolition debris chute setup covers anchor strategies in detail for both 10ft and longer configurations.
Load Capacity and Material Type Guidelines
Not everything that fits in a chute should go in a chute at full volume. Understanding what a 10ft heavy-duty or 10ft lite-duty chute is rated for protects the equipment, the crew, and the people below.
10ft Lite-Duty Capacity Considerations
- Intended for lighter demolition materials: loose drywall, light insulation batts, paper debris, small lumber off-cuts
- Avoid loading asphalt shingles in large bundles — break bundles apart and feed shingles in manageable quantities
- Do not load concrete block, brick, or tile in the lite-duty version; the impact loads at the bend and exit point exceed what lite-duty fabric is designed to absorb repeatedly
10ft Heavy-Duty Capacity Considerations
- Rated for the full range of construction demolition materials: asphalt shingles, broken concrete, brick, tile, framing lumber
- Even on the heavy-duty version, avoid loading an entire bundle of shingles at once — spread the weight and allow clearance between loads
- Never load items wider than the chute opening; forcing an oversize object through the chute stresses the fabric and can create a jam that causes workers to reach into an active load path
Prohibited Materials for Any Construction Trash Chute
- Liquid containers that are not fully sealed — spills coat the interior and create slip and chemical hazards
- Aerosol cans, propane cylinders, or any pressurized container
- Hazardous waste materials — asbestos-containing materials, lead paint debris, PCB-containing equipment
- Active electrical components or anything with an energized circuit
For a broader look at how debris chutes fit into responsible waste stream management, the EPA's materials waste and recycling data is a useful reference for understanding construction and demolition waste volumes nationally.

Worker Positioning and Active-Use Safety Rules
The checklist does not end once the chute is up. Active-use rules govern every person on site while debris is moving through the chute.
Top-of-Chute Worker Rules
- Feed debris into the chute opening — do not lean over or reach into the opening while a previous load is still traveling
- Keep one hand on a fixed structural element when loading from a roof edge — the chute is not a handrail
- Wear gloves rated for the debris type: heavy leather or cut-resistant gloves for asphalt shingles and broken tile, standard work gloves for wood and drywall
- Do not allow more than one person to load the chute at the same time
Ground-Level Worker Rules
- Stay outside the marked clearance zone at all times when debris is being loaded above
- Use a spotter role if the top worker cannot see the drop zone — the spotter communicates a clear or hold signal before each load
- Do not reach into the dumpster or catch area while the chute is active
- If a jam occurs, communicate a stop signal immediately — no one clears a jam while the top worker is still loading
Communication Protocol
Verbal communication works when crew members are close. On noisy sites or on drops where roof workers are not visible from ground level, establish a simple radio protocol or a hand signal system before the first load. "Loading" and "Clear" are the two commands that matter most.
Mid-Job Inspection Intervals
A chute that was fine at setup may develop issues during a long job. Schedule brief inspection pauses at regular intervals.
- Every 30 minutes of active use — visual check from the ground: does the chute still hang vertically? Are there any visible tears or bulges?
- Every time the debris type changes — switching from shingles to concrete raises the impact load; take 60 seconds to check the attachment points before resuming
- After any load jam or blockage — once the jam is cleared, inspect the area of the jam for fabric stress or seam separation before continuing
- Any time wind conditions increase noticeably — check lateral stability and tighten or add guide ropes as needed
Our guide to preventing debris spillage on multi-story buildings covers inspection intervals in more depth for longer chute configurations.
End-of-Job Breakdown Procedure
How you break down and store a 10ft chute determines how ready it is for the next job. A sloppy breakdown leads to damaged equipment and a longer pre-deployment inspection next time.
Breakdown Steps
- Announce "chute down" to the crew so everyone knows the loading phase has ended
- Disconnect secondary tie-offs before the primary hook — this keeps the chute controlled during removal
- Lower the chute hand-over-hand rather than dropping it — free-falling even a 10ft chute can stress attachment points and crack hardware
- Lay the chute flat on a clean surface and shake out any remaining debris from the interior before folding or rolling
- Inspect for new damage acquired during the job — tag any issues so they are addressed before the next deployment, not discovered on the next job
- Roll or fold the chute loosely (tight rolling over creases accelerates fabric wear) and store in a bag or bin that protects it from UV and sharp objects
Cleaning Before Storage
- A quick rinse with a garden hose removes fine dust, asphalt tar residue, and gypsum powder that can degrade fabric over time
- Do not use solvents or pressure washers — they can break down the polymer coating on the fabric
- Allow the chute to air-dry completely before folding for storage; mold growth in a damp stored chute weakens the fabric
Regulatory and Compliance Considerations
Contractors working on permitted projects may face local requirements governing debris management. While regulations vary by municipality and state, several consistent themes apply across most jurisdictions.
- Debris cannot be allowed to free-fall where it could strike workers below — a chute that directs debris into a contained receptacle directly addresses this requirement
- Clearance zone requirements often mirror general falling-object protection standards, which specify minimum distances from occupied areas
- Some jurisdictions require visible signage around the debris drop zone warning passersby of overhead work
Our state-by-state construction debris chute regulations guide is the best starting point for understanding what your specific job location requires. The EPA's recycling overview also provides context on responsible construction waste diversion that some local green-building programs reference.
Choosing the Right 10ft Chute for the Job
U-Chute offers two 10ft configurations: the lite-duty and the heavy-duty. Picking the right one before the job is a safety decision, not just a cost decision.
When to Choose the 10ft Lite-Duty
- Interior renovation debris: drywall, lightweight insulation, flooring underlayment, trim wood
- Attic cleanouts with light organic material
- Projects where the maximum single-item weight entering the chute will be under 20 lbs
When to Choose the 10ft Heavy-Duty
- Asphalt shingle removal — the single most common 10ft heavy-duty application
- Tile and brick demolition on single-story structures
- Any project where hard, angular debris is the primary material type
- Junk removal companies working residential projects with mixed heavy and light debris
If your drop height is consistently greater than 10ft, U-Chute's 25ft and 50ft heavy-duty configurations are the right tool. Read through the 50ft heavy-duty construction chute specifications guide for a full comparison of capacity, fabric rating, and section count. Junk removal companies in particular should also review our guide built specifically for junk removal operations.
Common Mistakes and How to Avoid Them
Every field checklist is built on lessons from real failures. These are the most frequent 10ft chute mistakes observed across roofing, demolition, and renovation crews — and the specific habits that prevent each one.
- Mistake: Anchoring to the gutter. Prevention: always identify a structural element — rafter tail, fascia board, roof joist, or scaffold — before the chute comes off the truck. If no structural anchor point exists, create one with a bracket rated for the load.
- Mistake: Loading the chute too fast. Prevention: establish a pacing rhythm. One load, watch it clear, then next load. Stacking debris in the chute creates a pressure buildup that can stress seams and cause a sudden dump at the exit.
- Mistake: Allowing bystanders in the clearance zone. Prevention: physical barriers — cones, caution tape, temporary fencing — are more reliable than verbal warnings. Set the perimeter before loading begins.
- Mistake: Skipping the post-job inspection. Prevention: build the inspection into the paid breakdown time, not as an afterthought. A 3-minute post-job check is the investment that keeps the chute in service for the next job.
- Mistake: Using a lite-duty chute for heavy materials to save money. Prevention: the lite-duty and heavy-duty versions exist for a reason. A failed lite-duty chute under heavy shingle load costs far more in equipment replacement and potential injury than the price difference between units.
Printable 10ft Construction Trash Chute Safety Checklist Summary
Use this condensed checklist as a site document. Print it, laminate it, and attach it to your chute storage bag so it is always at hand when the chute comes out.
Pre-Deployment
- Inspect fabric, seams, and interior surface for damage
- Inspect all attachment hardware — hooks, rings, grommets
- Confirm chute size matches debris type (lite-duty vs. heavy-duty)
Site Assessment
- Mark and clear the drop zone (minimum 6 feet around exit)
- Survey overhead hazards — power lines, gutters, overhangs
- Confirm ground surface is level and container is stable
Setup and Attachment
- Identify structural anchor point — no gutters or decorative elements
- Attach primary hook and close locking gate fully
- Add secondary tie-off to a separate anchor point
- Check for lateral swing — add wind guys if needed
Active Use
- Confirm communication protocol with crew before first load
- One loader at a time; one load at a time
- Ground workers stay outside clearance zone during loading
- Inspect every 30 minutes and after every jam
Breakdown and Storage
- Announce chute down; remove secondary then primary attachment
- Lower by hand — do not drop
- Clear interior debris, rinse, air-dry
- Inspect for new damage; tag any issues
- Store loosely rolled, protected from UV and sharp objects
The U-Chute FAQ page answers additional product-specific questions about sizing, shipping, and compatibility with common dumpster configurations.
Frequently Asked Questions
What is the maximum single load I should put in a 10ft heavy-duty construction trash chute?
There is no universal weight limit stamped on a chute, but the practical rule is to feed debris in manageable quantities — not all at once. For asphalt shingles, feed a small armful at a time rather than an entire bundle. For broken concrete or tile, load individual pieces or small handfuls. The goal is to avoid creating a pressure stack inside the chute, which strains seams and can cause a sudden uncontrolled release at the exit point. When in doubt, less per load and more frequent loads is always the safer approach.
Can I use a 10ft lite-duty chute for shingle removal?
No. Asphalt shingles are heavy, angular, and abrasive — exactly the material profile the lite-duty version is not designed for. The 10ft lite-duty is built for lighter renovation debris like drywall, light insulation, and trim material. For any shingle removal project, the 10ft heavy-duty is the correct choice. Using a lite-duty chute for heavy demolition materials risks fabric failure, which can result in debris spillage, equipment damage, and potential injury to workers in the drop zone below.
Does OSHA require a debris chute on single-story projects?
OSHA's general construction standards require that debris not be allowed to free-fall in a way that creates a hazard for workers or the public. On single-story projects, this typically means keeping the drop zone clear rather than requiring a formal chute. However, using a 10ft construction trash chute on single-story work is widely considered a best practice because it directs debris into a controlled exit point, reduces dust spread, and keeps the perimeter cleaner. Always check local regulations and the specific requirements of your job permit, as some jurisdictions layer additional debris management rules on top of federal baseline standards.
How do I secure a 10ft chute if there is no obvious structural anchor point?
This comes up frequently on interior renovation projects or on buildings where the exterior structural elements are behind cladding. Solutions include a purpose-built chute hook bracket that clamps to a window sill or door frame (confirm the frame is structurally solid first), a scaffold anchor if staging is already in place, or a roof anchor plate screwed into exposed rafter tails. What you must never do is attach to gutters, downspouts, or any decorative or non-structural element. If no safe anchor point exists without creating one, create it before deploying the chute.
How often should I replace a 10ft construction trash chute?
Replacement is driven by condition, not a fixed schedule. A chute that is properly inspected before and after every job, cleaned before storage, and stored away from UV exposure and sharp objects can serve dozens of projects over several years. The inspection checkpoints that trigger immediate retirement are: tears or punctures in the body fabric, separation of any seam, hardware that cannot be fully closed or locked, or grommets that have pulled partially through the fabric. U-Chute's polymer-fabric construction is designed for genuine reuse, so attentive care is the primary factor in longevity.
What is the best way to handle a debris jam in a 10ft chute?
Stop loading immediately and communicate a hold to the entire crew. Do not attempt to clear a jam while material is still being fed from above. Once loading has stopped and all workers are aware, examine the chute from a safe position outside the load path. For most jams, gentle lateral shaking of the chute is enough to free the blockage — gravity handles the rest. If the jam requires reaching into the chute or disassembling the attachment, have the ground worker handle it from below and keep the top worker away from the opening until the jam is cleared and you have confirmed no additional material is at risk of falling through.
Can a 10ft chute handle wet or water-soaked debris?
Yes, but wet debris changes the job significantly. Water-soaked drywall, waterlogged insulation, and wet shingles are substantially heavier than dry versions of the same material, so load quantities should be reduced. Wet debris also moves faster through the chute with less friction, which increases exit velocity at the bottom — this makes drop zone clearance even more important. After a job with wet debris, rinse and dry the chute thoroughly before storage. Moisture trapped in a stored chute can degrade the fabric and feed mold growth at the seams.
Ready to Order Your 10ft Construction Trash Chute?
U-Chute manufactures reusable polymer-fabric construction trash chutes and ships them free anywhere in the United States. Whether you need the 10ft lite-duty for interior renovation work or the 10ft heavy-duty for shingle removal and demolition, both are available to order directly online — no minimums, no quotes required, just the right tool at a clear price.
Visit the debris chute systems page to compare all four sizes and place your order. If you have questions about which size or configuration is right for your specific project, the contact page is the fastest way to get a straight answer. And if you want to dig deeper before buying, the about page explains what makes U-Chute's approach to construction debris management different from disposable alternatives.
Quality construction debris management without compromise — that is the standard every U-Chute is built to meet, job after job.